Section models are more than just architectural curiosities—they’re indispensable tools that bridge imagination and reality. Whether you’re an architect sketching a bold new vision, a contractor interpreting complex plans, or a client eager to peek inside a future building, section models offer clarity where flat drawings fall short. But what exactly are they, and why do they hold such sway in the design world? Let’s dive into the essentials of section models, tracing their roots and unpacking their significance.
Introduction to Section Models in Architecture
What Are Section Models?
A section model is a physical or digital model of a building sliced vertically along a chosen plane, exposing its inner workings like an architectural X-ray. Unlike floor plans, which show a horizontal organization, section models reveal the vertical dimension—picture walls, floors, ceilings, stairways, and structural skeletons all exposed. They can be crafted of foam and wood to sit atop the top of a studio table or cut into delicate 3D relief on the screen of a computer. What does it create? A graphic photo of the intersection of how a building’s outside and inside connect, from the thickening of a concrete footing to the uprise of a skylight peak. Section models are a building’s teller, explicating its material and spatial biology in great detail.

Why Section Models Matter in Design
Imagine trying to explain a symphony with a single note—two-dimensional sketches can be just as limiting. That’s where section models step in to fill the gap, giving architects and their collaborators a multi-dimensional view. They are crucial to seeing how spaces function vertically, so a messy attic doesn’t kill an otherwise stunning design, or a misplaced beam demolishes the building. Aside from their looks, section models are also a line of communication, helping clients grasp convoluted ideas without the necessity of deciphering jargon-infested plans. For engineers, they identify load-carrying characteristics and potential areas of vulnerability, while builders employ them to give life to ideas as buildings. In short, section models do not merely enhance design—they facilitate its fulfillment.
A Brief History of Section Models
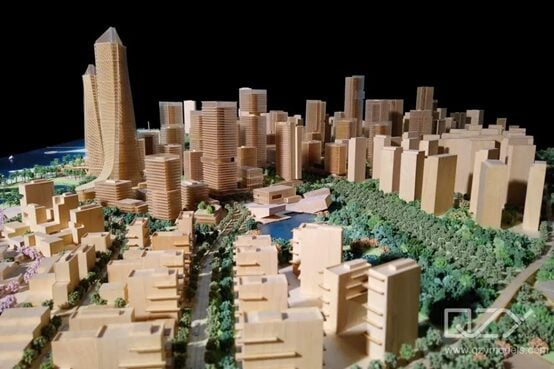
Section models have a centuries-long history, sketched onto parchment by Renaissance masters like Filippo Brunelleschi, who used hand-sketched sections to design masterworks like the dome of the Florence Cathedral. The initial sketches evolved with 18th- and 19th-century advancements in drafting technology and expanded to create elaborate ink-and-paper sections that fueled the architectural boom of the Industrial Revolution. By the 20th century, balsa wood or plaster models became studio staples, offering a tangible way of trying out ideas. Today, in the age of technology, this tradition has been supercharged—Revit software and 3D printers have turned section models into interactive, dynamic tools. From humble origins to advanced technology, section models are now an architectural practice.
The Purpose and Uses of Section Models
Section models are more than beautiful displays—they’re useful workhorses with several common uses. From smoothing the curve of a skyscraper to ensuring a cozy house is just right, section models offer data that flat drawings can’t. Let’s examine their significant functions in the design processes and why they’re an essential tool throughout every project.

Visualization of Design Concepts
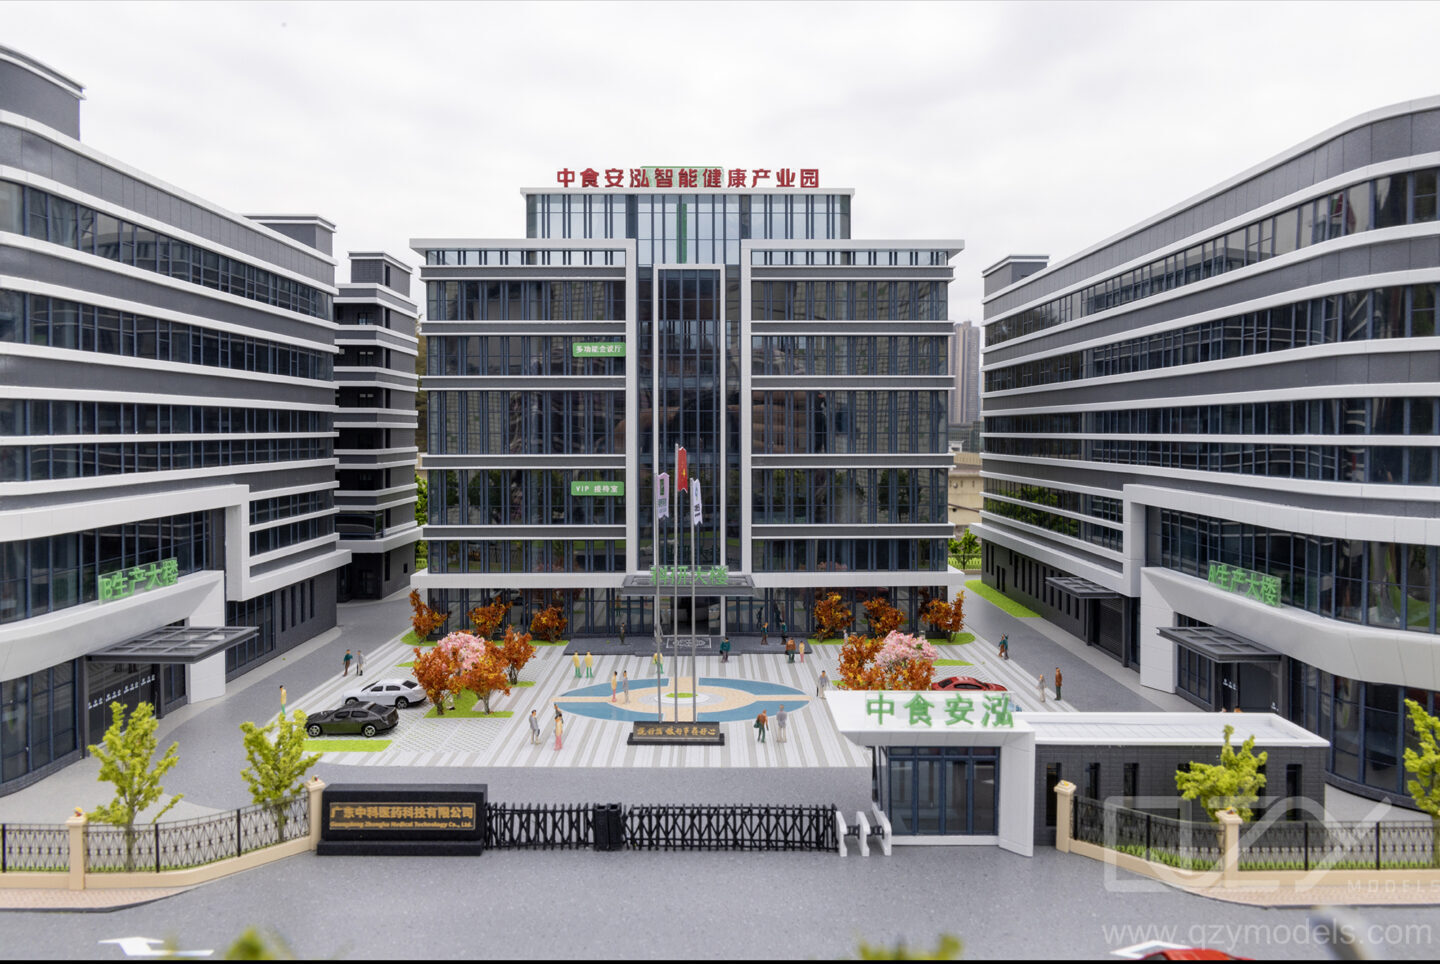
Picture this: An architect shows a vaulted ceiling with tumbling light, but the client can only see lines on paper. A section model makes the difference. By cutting through the design, it reveals how height, depth, and light play together—suddenly, that ceiling is no longer an idea but a physical phenomenon. This visual sorcery has no equal, enabling designers to play with proportions, refine aesthetics, and detect errors early on. For instance, a section model of a multi-story atrium may show whether a balcony feels oppressive or whether a window placement overwhelms the room with sun. It’s a rehearsal before the lights come up, ensuring the final performance sings.
Communication with Stakeholders
Architecture is a team sport, and section models are the playbook. Customers, unfamiliar with technical drawings, enjoy a model that shows the inside of a building, like how a kitchen opens into a living area or where a landing is for a staircase. Engineers use them to verify structural integrity, looking at where a column intersects a line of load. Contractors use sections to estimate materials and plan the construction sequence. A good section model can even break through language differences in overseas jobs, its visual vocabulary is more than words. In a profession where a miscommunication can cost millions, this specificity is worth gold.
Structural and Spatial Analysis
Section models are not merely beautiful. They are diagnostic instruments. They have opened up a building’s interior, enabling designers and engineers to query the flaws. Does a beam extend unsupported too far? Is the ceiling of a room claustrophobic or airy? A section model solves these problems with hard facts. For example, a factory section might establish whether gear will fit beneath a low ceiling, while a theater will ensure sightlines from every seat. This analytical benefit allows errors to be detected before they’re built, saving time, money, and aggravation later.
Construction Planning and Execution
Once the shovels hit the ground, section models are three-dimensional blueprints. Contractors use them to translate complex junctions—like where a sloping roof meets a vertical wall—or to sequence out stages, say, to lay foundations before constructing higher floors. A physical model portion might direct a carpenter sawing custom trusses, but a computer model in coordination with Building Information Modeling (BIM) software might generate accurate material lists. On the job, they are a reference point, where the built world matches up to the conceived vision. From pre-construction huddles to the final inspection, section models keep projects on track.
How to Create a Section Model: Step-by-Step Process
Creating a section model—physical or virtual—is a journey from fantasy to fact. It’s a process that blends creativity with precision, needing both an artistic vision and a steady hand (or mouse). Whether you’re a student working on a studio assignment, an architect testing a client presentation, or a tinkerer trying it out at home, this step-by-step tutorial will guide you through creating a section model that impresses. Let’s divide it into manageable steps, from drawing your initial line to delivering a refined masterpiece.

Step 1: Conceptualizing the Design
All section models begin with a question: Where do I cut? This is the conceptual phase, when you decide what story your model will tell. Begin by looking at your building’s plans—floor plans, elevations, and structural plans. Look for a plane that reveals something critical: maybe it’s a cut through a show-stopping staircase, a multi-story atrium, or a troublesome roof-to-wall transition. Sketch this cut line freehand or in a program like SketchUp, imagining what’s below. For example, a section through a museum might highlight a soaring gallery space, while one through a factory could expose machinery clearance. Tip: Mark key features (windows, beams, floors) on your sketch to guide the next steps. This isn’t just planning—it’s storytelling in outline form.
Step 2: Choosing Materials (Physical Models)
If you’re going physical, material choice shapes both form and function. Foam board is a go-to due to its affordability (around $5-$10 per sheet) and ease of cutting, perfect for quick mock-ups. Balsa wood, strong yet light, is perfect for intricate structures like trusses or frames—$10-$20 for a quality pack should do. Acrylic sheets give a clear, smooth finish for modern designs (around $15-$30), and basswood gives precision for delicate interiors at the same price. Each has its compromise: foam is not durable, balsa splinters, and acrylic needs clean cuts. Match your choice to your finish—a rough prototype can use foam, a client model is best in basswood. Gather tools too: an X-Acto knife, ruler, cutting mat, and glue (hot glue for ease, wood glue for strength). Your materials are your medium—choose wisely.

Step 3: Leveraging Software (Digital Models)
For computer section models, your software is your canvas. AutoCAD excels at clean 2D sections ($235/month), so you can draw crisp lines and export them for real construction. Revit, a BIM behemoth ($350/month), makes 3D sections in tandem with your building model—ideal for pros who want to track changes in real time. SketchUp ($299/year for Pro) offers friendly 3D slicing for the newcomer, and Rhino ($995 upfront) does detailed curves and custom cuts. Start by importing your master design (e.g., a floor plan), then use the section tool—SketchUp’s “Section Plane” or Revit’s “Section View”—to slice at your chosen plane. Move the view to expose interiors, tweak materials (wood textures, glass opacity), and render for realism. A computer saves time and allows edits—think of it as a sandbox before applying glue and blades.
Step 4: Building the Physical Model
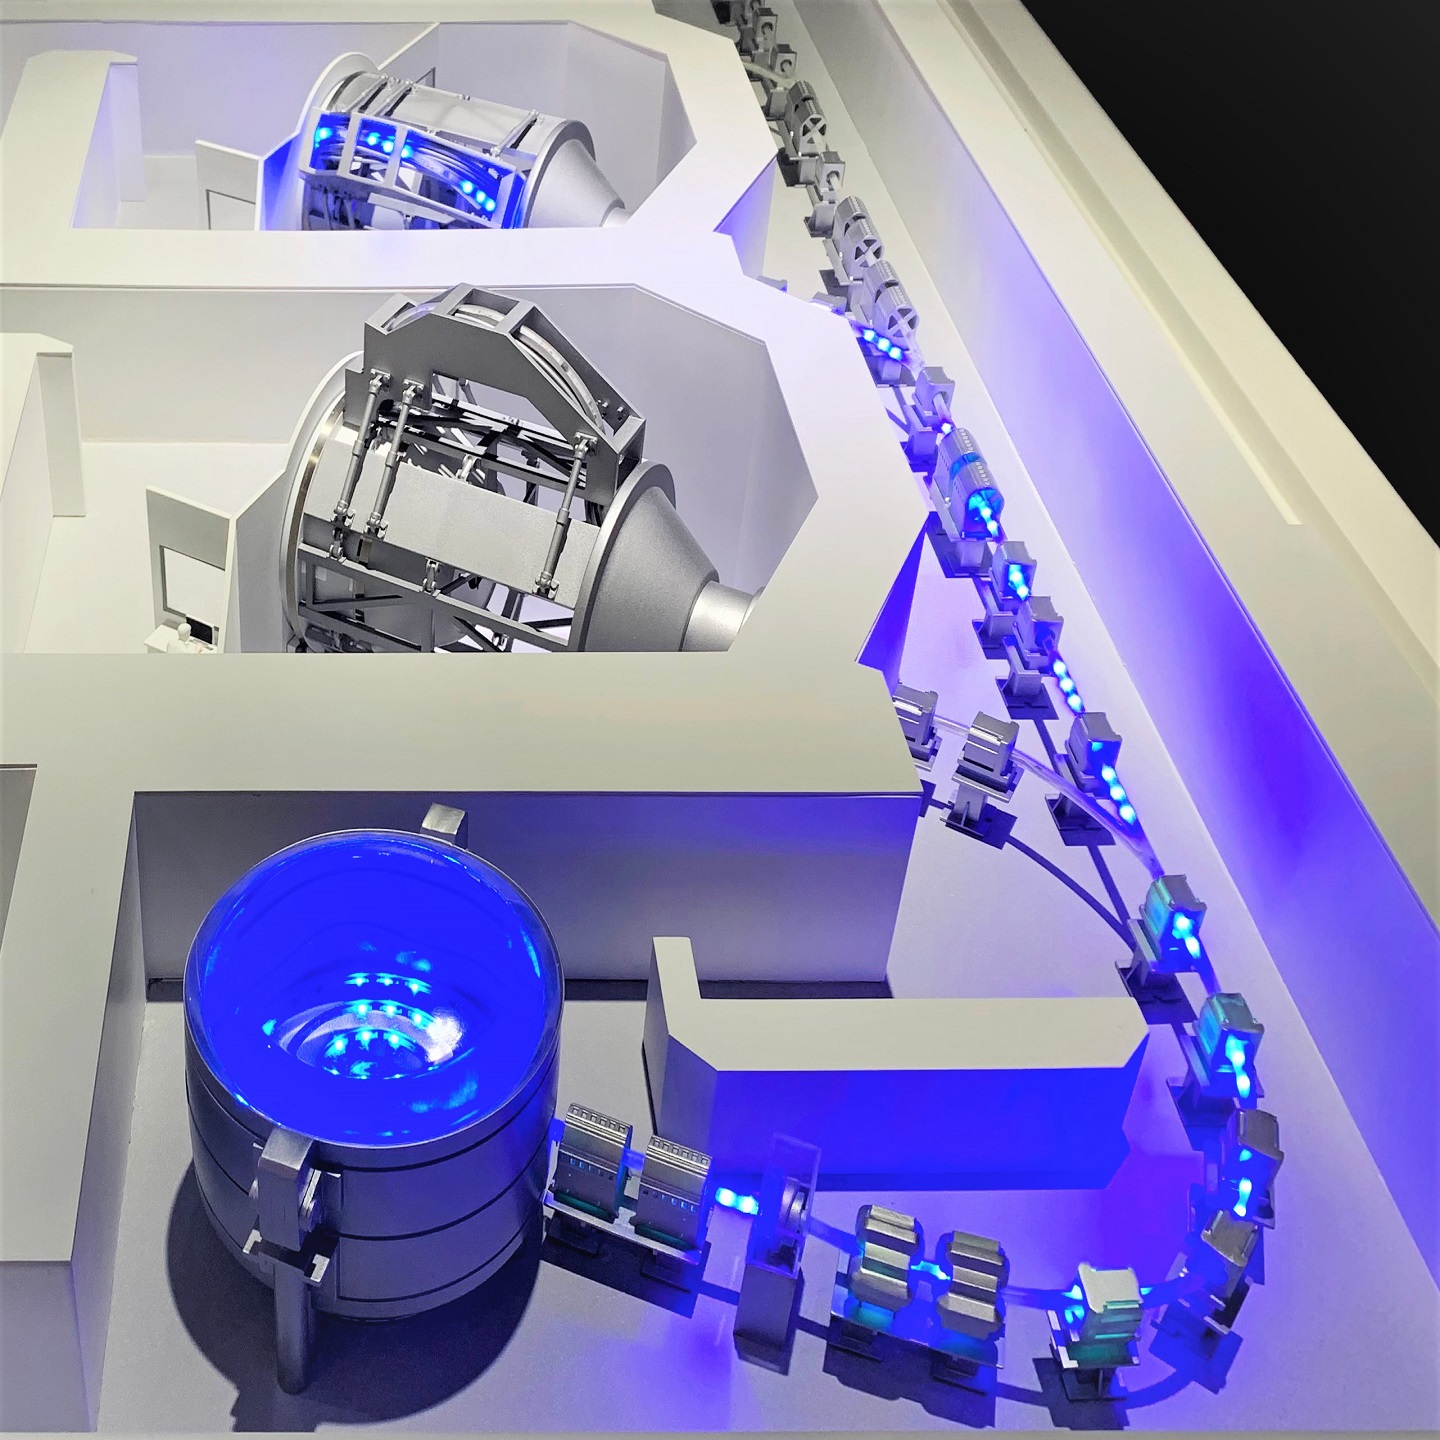
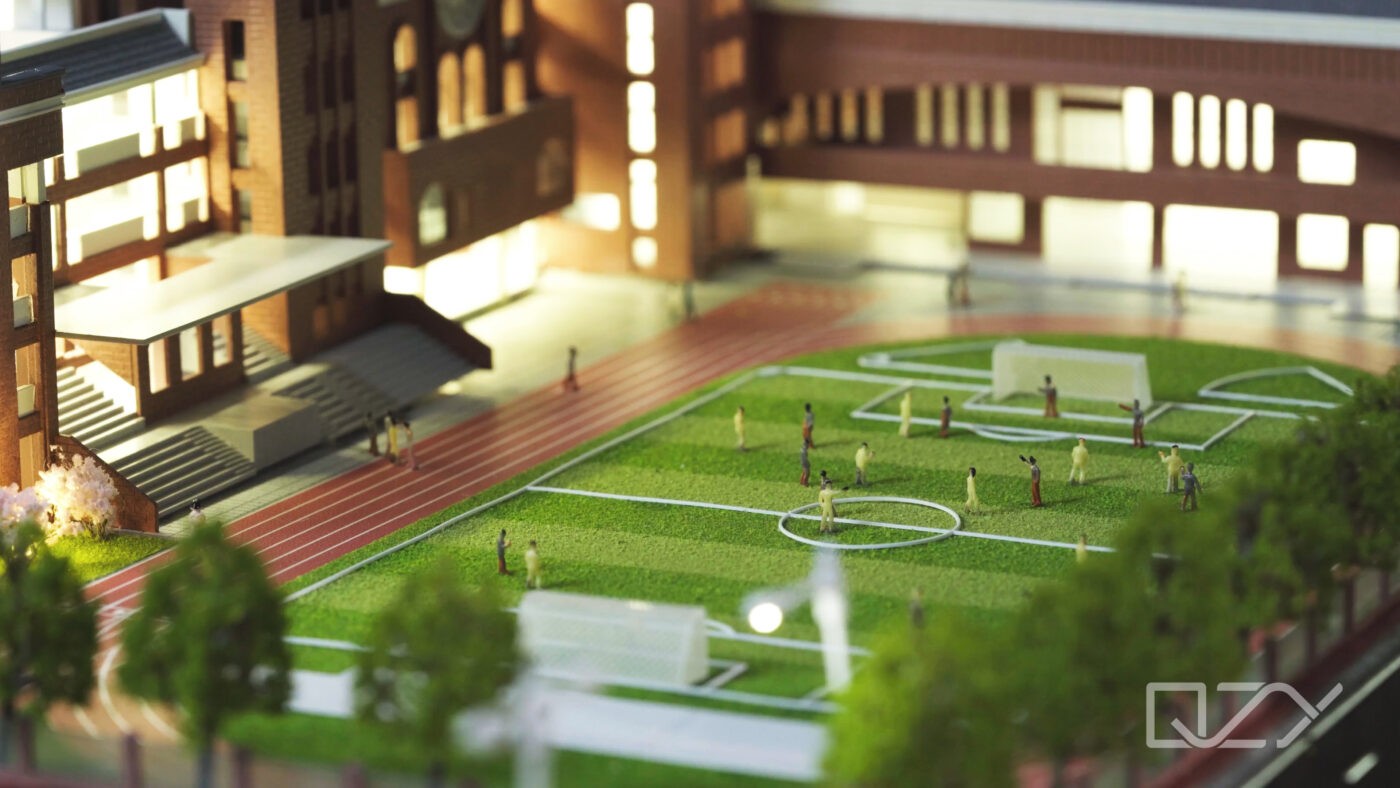
Finally, the get-your-hands-dirty part. Mark your section drawing onto your material with a pencil and straightedge—precaution here prevents future headaches. Cut along the lines using an X-Acto knife or laser cutter, if you have one (usually located in university facilities or maker spaces). To cut a two-story house section, you would cut a foam base for the foundation, balsa walls with window gaps, and a sloped roof piece. Layer by layer, construct it: glue the floor first, then walls, propping pieces against each other using pins or clamps as it dries. Add details—tiny furniture out of cardstock, hand-painted texture done with acrylics, or even LED strips to create lighting effects (a $10 detail that blows minds). Check scale constantly (e.g., 1:50 or 1:100) using a ruler or caliper. This is the moment when patience turns raw material into a mini marvel.
For those seeking professional precision, companies like QZY Models offer expert model making services, turning your sketches into custom-scale models with intricate details like laser-cut windows or handcrafted interiors.
Step 5: Refining and Presenting
A good section model doesn’t just exist—it communicates. Sand rough edges with fine-grit paper (120-200 grit) for a smooth finish, or polish acrylic with a cloth for clarity. Label significant sections—foundation, roofline, mezzanine—using small printed stickers or a fine-tipped pen; this enables non-professionals to follow. For computer models, create a high-resolution image (PNG or PDF) or a 360-degree view if using software like Enscape ($49/month). Test your model’s impact: hold it up to the light to see shadows play, or project it on-screen to detect blind spots. Present it on a solid background (plywood or foam core) or upload it to a portfolio site like Behance with a caption that links it to your design intention. This final touch of refinement puts your work from draft to statement, ready to be criticized or applauded.
Tools and Software for Section Models
The right tools transform section models from concept to reality—software for precision, 3D printers for speed, and VR/AR for immersion. Below is a breakdown of top options in 2025, tailored for architects, students, and pros. Compare features, costs, and use cases to find your fit.
| Category | Tool | Cost | Key Features | Best For | Pros | Cons |
|---|---|---|---|---|---|---|
| Software | AutoCAD | $235/month | Precise 2D sections, annotations | Technical drafts (e.g., warehouse) | Accuracy, export options | Weak 3D rendering |
| Revit | $350/month | 3D BIM sections, real-time updates | Complex projects (e.g., hospitals) | Collaboration, integration | Steep learning curve | |
| SketchUp Pro | $299/year | Intuitive 3D slicing, textures | Beginners, small firms (e.g., homes) | Ease of use, affordable | Limited BIM depth | |
| Rhino | $995 one-time | Curved sections, parametric plugins | Organic designs (e.g., pavilions) | Flexibility, no subs | Higher upfront cost | |
| Blender | Free | 3D modeling, artistic section renders | Budget creatives (e.g., museums) | Free, powerful | Time to master | |
| 3D Printing | Formlabs Form 4 | $4,499 + $150/L resin | 25-micron detail, small intricate parts | Detailed models (e.g., staircases) | Precision, quality | High cost, small build size |
| Ultimaker S7 | $8,299 + $40/kg filament | Large, durable sections (13x13x15 in) | Big facades (e.g., towers) | Size, durability | Expensive, slower prints | |
| Free vs. Paid | Blender (Free) | $0 | 3D modeling, Boolean section cuts | Hobbyists, students | No cost, versatile | Learning curve |
| Fusion 360 | Free (students), $70/month | CAD precision, 3D slicing | Small projects (e.g., houses) | Free tier, robust | Paid for pros | |
| SketchUp Free | $0 | Basic 3D sections, web-based | Quick prototypes | Free, simple | Limited exports | |
| VR/AR | Enscape | $49/month | VR walkthroughs from Revit/SketchUp | Client pitches (e.g., libraries) | Immersive, easy plugin | Needs headset ($499) |
| Unity | Free, $40/month Pro | Interactive VR sections, hotspots | Remote demos (e.g., galleries) | Customizable, free tier | Setup time (10-20 hrs) | |
| Adobe Aero | Free | AR overlays on phone/tablet | In-person meetings | Free, quick | Less interactive |
Architectural Model Makers like QZY Models leverage advanced 3D printing to craft these detailed sections, ensuring accuracy and speed for projects of any scale.
Modern Trends and Innovations in Section Models
Section models aren’t lagging—they’re speeding forward with tech and sustainability in a breakneck pace. From 3D printers spewing out intricate facades to virtual reality where you can step into a design, 2025 is the golden era of architectural modeling. These innovations aren’t just showy tricks—they’re revolutionizing the way architects design, collaborate, and build. Join us in exploring the trends driving section models into the future, with live examples to fuel your next project.
3D Printing and Rapid Prototyping
3D printing has turned section model building into a high-speed, high-resolution sport. Machines like the Formlabs Form 4 ($4,499) produce resin models with 25-micron layers—imagine a section of a twisting stadium roof with all the curves intact, printed in 8 hours. The Bambu Lab X1 Carbon ($1,199) offers multi-color filament printing, in which one model can show concrete gray next to glass blue, all in a 10x10x10-inch build volume. Workflow’s simple: export Rhino file, slice in Bambu Studio (free), and let it grow—cleanup’s a rinse or support snap-off. Prices have come down—resin’s $120-$150 per liter now, down 20% from 2023, and accessible to small companies. The catch? Prototypes that used to take a week of hand cutting now wow clients in days, with pieces like window frames or HVAC ducts baked in.

Virtual Reality (VR) and Augmented Reality (AR)
VR and AR are flipping the script on section model presentations. With Enscape ($49/month), plug a Revit section into a Meta Quest 3 ($499), and you’re walking through a sliced-open library—check if skylights flood the stacks or if a mezzanine feels claustrophobic. Unity (free tier, $40/month Pro) takes it further: import a SketchUp section, add hotspots (click a beam for its specs), and host a VR tour for remote clients. AR’s no slouch either—Adobe Aero (free) projects a section model onto a conference table via iPhone, letting a developer spin it mid-meeting. Setup’s a hurdle: clean 3D files, 10-20 hours tweaking textures, and a decent GPU (e.g., NVIDIA RTX 4060, $299). But the payoff—clients gasping as they “enter” a design—makes it a 2025 must-have for pitches.
Sustainable Materials in Model-Making
Green design’s hijacked section models, with green materials soaring. Recycled PLA 3D printing filament (cost: $25/kg) made from trash plastic has a carbon footprint decreased by 30% relative to virgin PLA and can endure hard sections like a school wing. Cornstarch-based compostable foam ($12/panel) substitutes for boards made of petroleum; it cuts just as easily but biodegrades within months. Salvage wood (barn oak reused, e.g., $20/bundle) adds a country feeling to luxury models—use, for instance, a cabin piece with the original grain. Businesses like Portland’s Studio Green show these in net-zero buildings, proving that sustainability is worth it. Downside: rural areas experience limited availability, and costs can be higher than traditional methods by 10-20%. However, it’s a benefit to environmental architects and consumers.

AI-Assisted Design
Artificial intelligence is entering section model workflows, pre-optimizing designs before the first cut. Autodesk’s Generative Design (included with Revit, $350/month) analyzes a section’s structural needs—say, a bridge pavilion—spewing out 10 iterations with best beam locations in hours, not days. Spacemaker ($250/month) uses AI to optimize urban slices for light and wind, perfect for a high-rise slice. Even budget options like Stable Diffusion (with a $100 GPU) can generate concept renders—type in “modern atrium section,” and it doodles up ideas to complete in Rhino. The compromise? AI needs clean inputs and a bit of trial-and-error—5-10 iterations to achieve it. But for speed and imagination, it’s a game-changer, saving 20-40% of design time on challenging projects.
Partnering with experts like QZY Models can bring similar innovation to your projects, with their custom scale models reflecting cutting-edge techniques and design intent.
Challenges and Solutions in Section Model Creation
Building a section model—whether it’s foam on a bench or pixels in Revit—comes with its brand of headaches. Scale becomes wonky, details get in the way, deadlines loom, and software throws curveballs. But all troubles have solutions if you know where to seek them out. This section covers the biggest blunders architects commit while constructing section models, each paired with a solution to keep your project moving along. Let’s dive into the chaos and clean it up.
Maintaining Scale and Proportion
Challenge: Scaling properly is a tightrope walk—one misstep, and your section model looks like a funhouse mirror image. A 1:100 house section can shrink a door to dollhouse size or blow a roof up to a cartoon overhang if measurements get out of hand. Hand-cutting makes it worse; a shaky knife wanders 2mm off, and your wall’s now a foot thick in real space. Digital isn’t immune—import a plan into SketchUp without unit checking, and your meters become millimeters.
Solution: Fix scale up front. For physical models, employ a scale ruler ($10) and double-check each cut against your plan—mark 1cm as 1m at 1:100, no exceptions. Calipers ($15) detect minuscule drifts. Digitally, define units in software (e.g., Revit’s Project Units) before commencing, and sanity-check with a known dimension, such as a 3m wall, after importing. Print a 2D section to cross-check if 3D printing. Accuracies here prevent subsequent rework.

Balancing Detail and Clarity
Challenge: Too much detail makes a section model a cluttered mess—add in every light and chair, and clients can’t perceive the atrium flow. Too little, and it’s a hollow shell, lacking the soul of the design. A physical model with stuffed-out interiors (little foam furniture pieces glued around) obscures wall lines, and a digital render, leaving out texture, is shallow. Finding that middle ground confounds even the most experienced designers.
Solution: Rank-order hierarchy. Highlight structural stars—walls, floors, beams—with heavy material (balsa for walls, acrylic for glazing) and light colors for secondary pieces (gray paint for furniture). In digital space, use Revit’s “Detail Level” (Coarse for overview, Fine for zooms) or SketchUp’s toggles to show/hide extras. Test visibility: stand back 5 feet from a real model or zoom out in software—can you still read the big moves? Cut back till it sings with clarity without losing character.
Time Constraints in Tight Deadlines
Challenge: Deadlines are not concerned with your process—a client needs a section model for a Monday pitch, and it’s Friday at lunch. Hand-building a 2×2-foot section might take 20 hours, whereas a digital render with tweaks consumes 10-15, no crashes. 3D printing? Add 12 hours for a decent print, plus resin dry time. Panic mode sets in, and quality takes a hit—rushed cuts shake, renders miss shadows.
Solution: Use speed hacks. With physical, pre-cut bulk materials (e.g., foam sheets), and construct modularly—glue walls first, slot roofs later. Digitally, use templates—Revit’s saved views or SketchUp’s pre-set scenes save setup time by 30%. 3D print overnight using a fast machine (Bambu Lab X1, $1,199) at 0.2mm layers, not 0.1mm, cut print time to 6 hours. Outsource grunt work—local makerspaces laser-cut for $50-$100, so you can shine. Plan ahead a buffer: start 48 hours in advance, even if it’s sloppy.
Overcoming Software Learning Curves
Challenge: New software feels like a brick wall—Revit’s BIM logic baffles AutoCAD vets, Rhino’s curves stump SketchUp fans, and Blender’s interface scares off everyone. A student might spend 10 hours slicing a section wrong in Blender, while a pro fumbles Rhino’s Grasshopper for parametric cuts. Tutorials help, but time sinks—meanwhile, your model’s due yesterday.
Solution: Start small, scale up. Pick one tool and master its section basics—SketchUp’s “Section Plane” takes 30 minutes via YouTube (search “SketchUp section tutorial 2025”). For Revit, try Autodesk’s free 1-hour “Getting Started” course; Rhino users hit Lynda.com’s 2-hour essentials ($25/month). Free resources shine—Blender Guru’s YouTube cuts Blender’s curve to 5 hours for basics. Pair with a cheat sheet (e.g., Revit shortcuts PDF) and practice on a dummy cube before your real design. If stuck, forums like Reddit’s r/architecture solve glitches fast. Bite-sized learning beats overwhelm every time.
Conclusion: Mastering Section Models for Architectural Success
Section models are essential for visualizing designs, uniting teams, and refining projects from concept to completion. This guide explored their creation, tools, budgeting, and cutting-edge trends like 3D printing and VR, equipping you with practical insights to succeed. Whether you’re crafting a DIY section or embracing AI innovation, they’re a powerful ally. Ready to elevate your next model? Contact QZY Models at qzymodels.com for expert architectural modeling services tailored to your vision.